728x90
반응형
대부분 이 FirebaseInstanceIdService 클래스를 extends로 상속받아 구현되는 소스코드지만
지금은 FirebaseInstanceIdService 이 클래스가 사용이 안되는 클래스입니다.
build.gradle(Module: app)
apply plugin: 'com.android.application'

android {
compileSdkVersion 29
buildToolsVersion "29.0.2"
defaultConfig {
applicationId "com.example.delivery"
minSdkVersion 16
targetSdkVersion 29
versionCode 1
versionName "1.0"
testInstrumentationRunner "androidx.test.runner.AndroidJUnitRunner"
}
buildTypes {
release {
minifyEnabled false
proguardFiles getDefaultProguardFile('proguard-android-optimize.txt'), 'proguard-rules.pro'
}
}
}
apply plugin: 'com.android.application' //추가
dependencies {
implementation fileTree(dir: 'libs', include: ['*.jar'])
implementation 'androidx.appcompat:appcompat:1.1.0'
implementation 'androidx.constraintlayout:constraintlayout:1.1.3'
implementation 'com.google.firebase:firebase-messaging:19.0.0' //다른 버전을 사용했더니 최신버전이 19.0.0버전이니                                                                                        이것으로 고치라고 에러가 뜨더군요.
testImplementation 'junit:junit:4.12'
androidTestImplementation 'androidx.test:runner:1.2.0'
androidTestImplementation 'androidx.test.espresso:espresso-core:3.2.0'
implementation 'com.google.firebase:firebase-analytics:17.2.0' //추가
}
apply plugin: 'com.google.gms.google-services' //추가
build.gradle(Project: -----)
// Top-level build file where you can add configuration options common to all sub-projects/modules.

buildscript {
repositories {
google() //추가
jcenter()

}
dependencies {
classpath 'com.android.tools.build:gradle:3.5.0'
classpath 'com.google.gms:google-services:4.3.2' //추가
// NOTE: Do not place your application dependencies here; they belong
// in the individual module build.gradle files
}
}

allprojects {
repositories {
google() //추가
jcenter()
}
}

task clean(type: Delete) {
delete rootProject.buildDir
}
AndoridManifest.xml
application 안에
<service android:name=".My_Firebase_Messaging_Service">
<intent-filter>
<action android:name="com.google.firebase.MESSAGING_EVENT" />
</intent-filter>
</service>
코드 추가해줍니다.
My_Firebase_Messging_Service 클래스 하나 만들어줍니다.
import android.util.Log;
import com.google.firebase.messaging.FirebaseMessagingService;
import com.google.firebase.messaging.RemoteMessage;

public class My_Firebase_Messaging_Service extends FirebaseMessagingService{
private static final String TAG = "MyFirebaseMsgService";

@Override
public void onNewToken(String s) {
super.onNewToken(s);
}

@Override
public void onMessageReceived(RemoteMessage remoteMessage) {
Log.d(TAG, "From: " + remoteMessage.getFrom());
if (remoteMessage.getData().size() > 0) {
Log.d(TAG, "Message data payload: " + remoteMessage.getData());
}
}
}
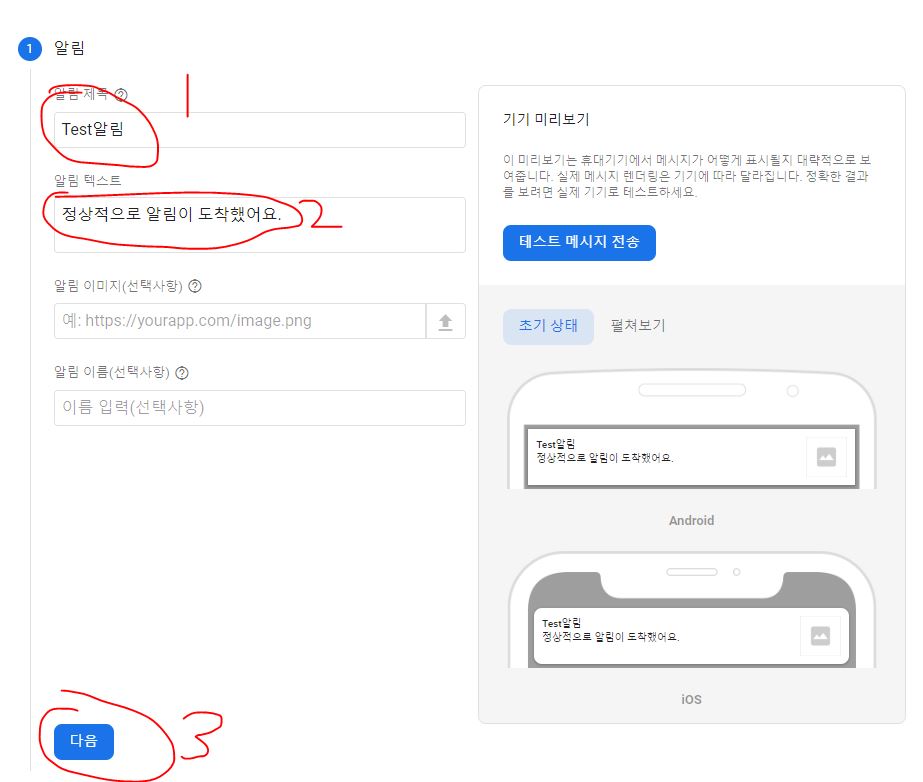
이제 파이어베이스 홈페이지에서 클라우드 메세지를 보내볼게요.


타겟에서는 빨간색으로 표시된 아래방향 화살표를 누르면 등록해놓은 어플을 선택 할 수 있습니다.
그리고 다음 다음 누르면서 진행해주면 정상적으로 푸시알람이 작동됩니다.
궁금하신 사항은 댓글 남겨주세요.
728x90
반응형
'Android' 카테고리의 다른 글
| 안드로이드 화면을 세로로 고정시키고싶을때 (0) | 2019.10.17 |
|---|---|
| Android(안드로이드) 터치하여 TextView 복사하기. (1) | 2019.10.10 |
| 안드로이드 스튜디오 파이어베이스 연동 (2) | 2019.10.01 |
| WebView에서 http로 시작하는 주소로 인해 어플에서 실행이 안될시 (0) | 2019.10.01 |
| Intro 화면 이후 Main화면으로 넘어가기 (2) | 2019.09.26 |


댓글